
Ergonomic Bicycle Repair Workbench Setup for Comfort and Control
By Elena Kovács • 25th Sep
What to do
Build the station around the repairs you perform: support the bicycle separately from the bench, keep rear-wheel and drivetrain access clear, and use distinct clean, drivetrain, and brake-safe zones. Test the layout during real tasks, then correct the most repeated reach, obstruction, or contamination problem.
- Start with: List your common repairs and classify each as stand-supported, wheel-supported, or bench-only. Preserve floor space for high-force jobs that should not rely on a frame clamp.
- Then: Rehearse shifting, parts sorting, and torque-check workflows before fixing the layout. Keep the rear wheel, crank, derailleur, and clamp point visible and reachable.
- Important prerequisite: Follow bicycle and component instructions for clamping and cleaning.
Important: No universal bench height, reach distance, or support-system compatibility is established here, so validate the setup with your actual bicycle and consult the relevant manual when clamping suitability is uncertain.
A well-planned bicycle repair workbench is not simply a bench with a few hex keys on it. It is a bike repair bench arranged so the bicycle, the task, and your hands stay in view without turning each adjustment into a reach, a twist, or a search. The goal is repeatable control: support the bike appropriately, reserve a clean surface for parts, and make the next tool obvious before you need it.
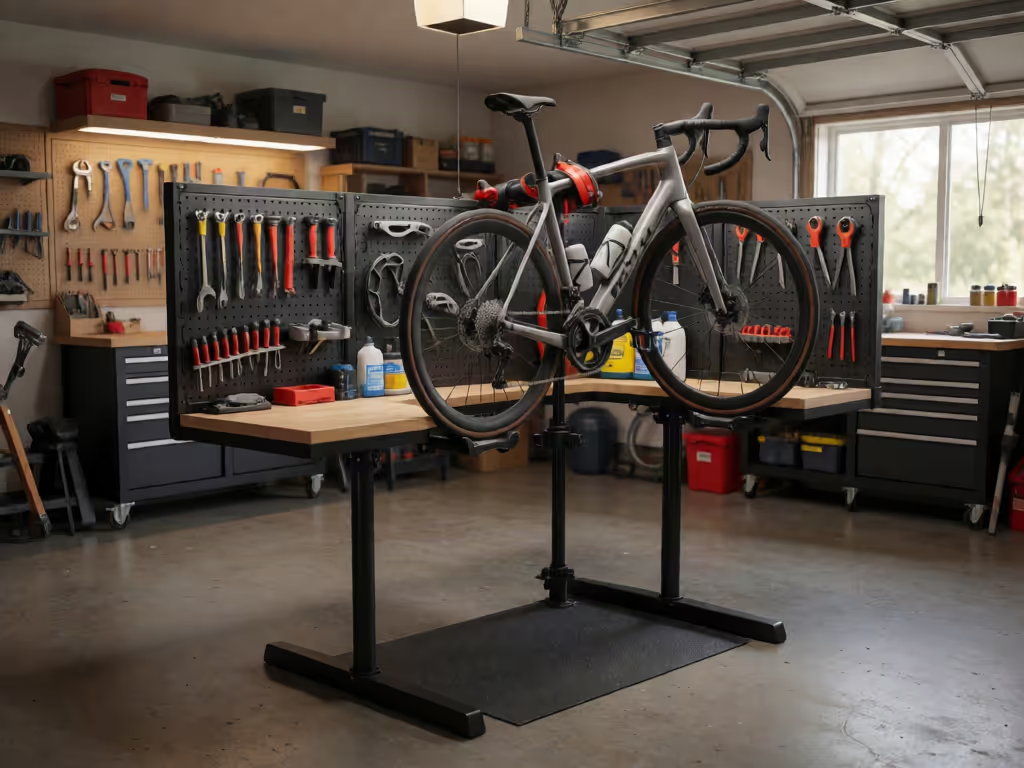
A useful distinction comes first: the bench is your staging and precision surface; a repair stand or floor support is the bicycle's support. Trying to make one surface do every job usually creates clutter or awkward access. Your posture is a spec; design the bench around it using these workbench height ergonomics principles.
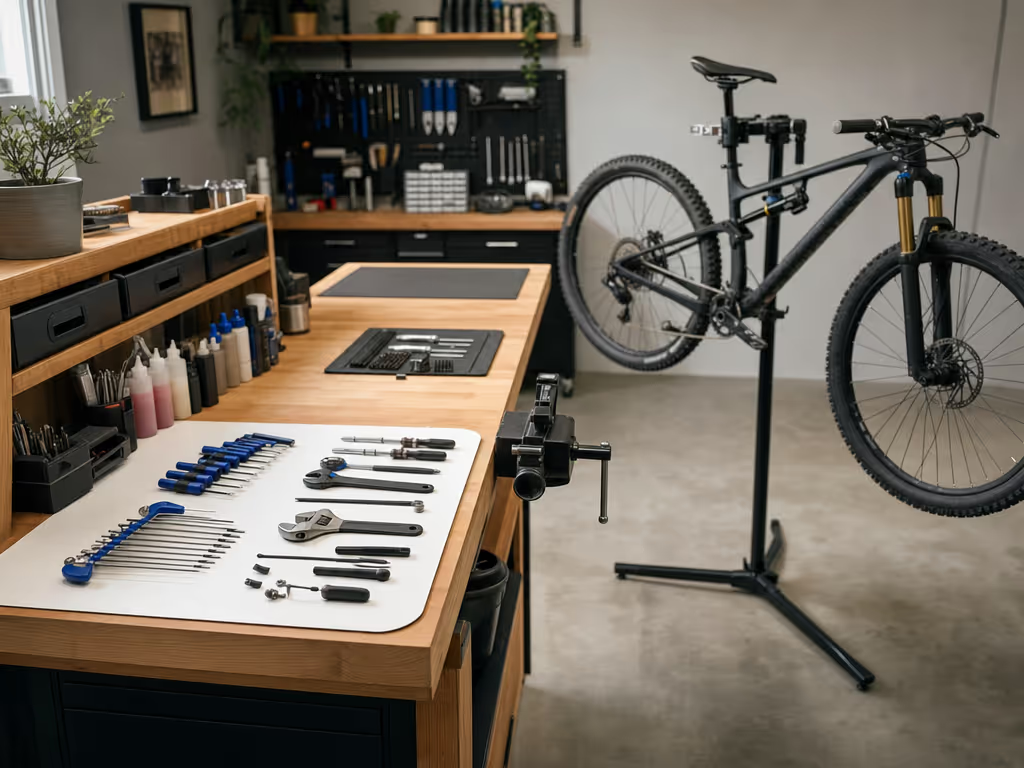
Step 1: Map the Repairs You Actually Perform
Before moving a drawer or buying storage, list the work your station sees in a typical month. Use task groups rather than a wish list of tools:
- Drivetrain service: chain cleaning, lubrication, pulley-wheel cleaning, and shifting checks.
- Adjustment and assembly: cockpit changes, accessory installation, bolt checks, and parts swaps.
- Wheel-on work: brake and wheel-related inspection with the wheel installed.
- High-force work: tasks where you need the bike solidly supported on its wheels.
- Small-part work: sorting bolts, laying out removed components, and consulting component instructions.
This audit tells you what must remain clear. For example, Shimano's shifting-check procedure calls for the bicycle to be in a stand with the rear wheel off the ground while you turn the pedals and shift through the cassette. That makes rear-wheel clearance and access to the crank and derailleur functional requirements, not optional conveniences.
Mark each task as either bike supported above the floor, bike supported on its wheels, or bench-only. You now have the beginnings of a workstation that follows the work instead of forcing the work to follow the furniture.
Step 2: Separate the Bike Support Zone From the Bench Zone
Place the bike support so you can approach the drivetrain side without the bench corner blocking the rear derailleur, cassette, or crank. Then preserve one unobstructed side of the bench for trays, tools, and removed parts. For more ways to keep trays, tools, and parts accessible without crowding the work surface, see these workbench storage hacks.
Do a no-tool rehearsal:
- Put a bicycle in its normal supported position.
- Stand where you would turn the pedals and operate the shifter.
- Walk to the bench, pick up an imaginary tool, and return.
- Reach visually to the clamp point, rear derailleur, and crank without moving the bike.
If you repeatedly sidestep around a leg, drawer, or bench corner, move that obstruction now. This is a measurement-backed approach without pretending there is one universal room layout or clearance number. Your repeated travel path is the data.
For clamp-style stands, a technical editor at Road Bike Rider recommends clamping at the seatpost when feasible, checking that no cable, bottle boss, or housing guide sits in the clamp path, and tightening only gradually until the bicycle is secure. Treat this as informed general guidance, not a substitute for your bicycle or component maker's instructions. If the suitability of a frame, seatpost, integrated mast, or dropper post is uncertain, consult the relevant manual first. For a dropper post, the same guidance is to grip the non-moving portion rather than the moving section.
Keep the clamp area visible and reachable. Adequate workbench lighting can make the clamp, derailleur, and small parts easier to inspect without leaning or repositioning the bike. A stand whose clamp is hidden behind a crowded bench invites rushed setup, and rushed setup is where control disappears.
Step 3: Tune the Work Surface Through a Short Trial, Not a Fixed Formula
There is no single verified bench height that fits every repair task or every person. Rather than copying a dimension from a general woodworking plan, test your bicycle workbench setup with the jobs that matter.
Start with an empty top and run three brief trials on separate occasions:
- Sort fasteners and work on a small component tray.
- Use a torque wrench on a bicycle fastener according to the component specification or manual.
- Perform a rear-shifting check with the bike supported and the rear wheel clear.
Notice what makes you compensate: a raised shoulder to reach the tray, a bent posture over parts, knees contacting storage, or tools placed beyond an easy first reach. These are not character flaws; they are setup signals. Also review these workbench safety practices so an ergonomic layout does not overlook slips, unsecured parts, or other workshop hazards.
Change one variable at a time. That might mean shifting the tray location, clearing the space below the front edge, changing the stand's position relative to the bench, or using a temporary platform to test an alternate working level. Record what changed and whether the task became calmer and more controlled.
I learned this the unglamorous way after a long run of detailed bench work: lowering a surface by just 30 mm and adding somewhere to rest a foot changed my endurance more than any decorative feature could. Small ergonomic wins stack into big improvements because you stop spending attention fighting the setup.
If a layout asks you to brace, twist, or search during a routine task, revise the layout before you blame your technique.
Step 4: Build a Three-Zone Tool Layout
A clean system for bike repair tool storage is less about owning more organizers and more about preventing contamination and mix-ups. Divide the bench into three deliberate zones.
Zone A: Clean precision zone
Reserve a dry, uncluttered area for small parts, instructions, and measurement or tightening tools. Keep the torque wrench here, where it is visible at the end of an adjustment job. Shimano advises using a torque wrench to verify bicycle fasteners are tightened to specification; those specifications may appear on the component or in its manual.
Use a shallow tray or mat for removed hardware. The point is not a particular tray design. It is giving every loose part a visible boundary so it cannot migrate into the drivetrain-cleaning area.
Zone B: Drivetrain-service zone
Keep chain-cleaning supplies together: brush, drivetrain degreaser, and dedicated cloths. Shimano's sequence is straightforward: clean the chain with a brush and degreaser, then re-lubricate. If derailleur pulley wheels are full of grime, Shimano advises scrubbing them with degreaser and a brush; make sure your bike position leaves access to that area.
After cleaning, move the bike (or at minimum the supplies) out of the wet, dirty workflow before lubrication. Shimano advises applying lubricant to the chain rollers rather than coating the pulley wheels, because lubricant on pulley wheels attracts grime.
Zone C: Brake-safe zone
Keep chain lubricant, degreaser cloths, and brake-related work physically separate. SRAM's guidance for brake pads and rotors is to avoid handling them with bare hands and to clean them only with isopropyl alcohol. That is a clear reason not to let a general-purpose oily rag become the default bench rag.
For SRAM AXS electronic components specifically, SRAM directs owners to use soap and water rather than harsh degreasers, which it says can damage seals. It also advises against direct pressure washing. In practical terms, do not let a drivetrain-degreasing routine spill indiscriminately into the electronics-cleaning routine.
Step 5: Choose Support by Task, Not by Habit
A clamp stand is useful for access and shifting checks, but it is not the answer to every repair. For jobs imposing large force on the frame (such as freeing a frozen pedal or removing press-fit bottom-bracket cups, as noted by a technical editor at Road Bike Rider), support the bike on its wheels on the floor rather than relying on a frame clamp.
That means your workstation should preserve a clear patch of floor near the bench. Store the tools for these jobs where you can carry them to the floor-support position without dismantling your entire setup.
A dropout-mounted support has its own task limitation: it requires removing the front wheel, which restricts front-wheel truing and front-brake work with the wheel installed. When adapting the station, consider workbench add-ons for specialized tasks such as dedicated mounts, hold-downs, or accessory supports that improve stability without rebuilding the bench. This is not a verdict on every support system; it is a reminder to match your support method to the repair you expect to perform.
Step 6: Run a Five-Minute End-of-Job Reset
A bike maintenance workstation stays comfortable only when reset is built into the workflow. At the end of each job:
- Return clean tools to their assigned locations.
- Isolate drivetrain cloths from the clean precision zone.
- Wipe away excess chain lubricant after lubrication, consistent with SRAM's AXS care sequence.
- Clear the bench top so the next repair begins with an open work surface.
- Note one friction point: an awkward reach, a missing tray, a blocked approach, or a tool that did not live where your hand expected.
Do not redesign everything after one session. Correct the single most repeated friction point, then test again. That is how a generic workbench for bicycle maintenance becomes a station that feels tailored to you.
Your Next Step: Perform One Live Layout Test
Set up your bike, bench, and most-used tools exactly as they sit today. Perform a rear-shifting check, a small-parts task, and a mock torque-wrench task. Write down every unnecessary step, reach, and crossover between oily and clean work.
Then make one change before your next repair: move the stand, clear knee space, relocate the torque wrench, or establish separate drivetrain and brake-safe zones. Comfort and control are built from these small, observable corrections, not from a perfect-looking bench on day one.
Related Articles