Shared Space Workbench: Build with Roommates
By Aisha Thompson • 12th Apr

Setting up a shared space workbench with roommates feels like negotiating peace after years of conflict. One person needs precision for cabinetry, another wants to build side tables, and someone's partner just wants a quiet spot to sand. The shared apartment or basement workshop isn't a compromise waiting to happen, it's an opportunity to build a system that works better than solo shops because it forces clarity. Roommate workshop solutions start with one principle: begin with workflows; the right bench choices follow.
I learned this the hard way during my first solo build. I wasted hours chasing clamps and tools buried under lumber. When a mentor walked me through a reset (clear zones, fixed clamping points, a home for everything), that single afternoon transformed the project. The tool wasn't more expensive. The bench wasn't larger. What changed was discipline. That's what shared spaces demand, and what they reward.
Why Shared Workbenches Fail (And How to Fix It)
Most roommate workshops die because no one owns the workflow. One person leaves a project clamped in the vise. Another stacks boards on the top. Power tools disappear. The bench becomes a storage platform, not a working surface.
The fix is intentional design. A shared workbench must enforce boundaries through its structure (not rules on a note taped to the wall).
Key principles:
- Modularity: Two smaller halves or configurable sections mean simultaneous users don't collide. If one person needs the bench for 2-hour detail work and another for quick cuts, they can each claim a zone.
- Clear zones: Dedicate one end for finishing or power-tool prep, another for hand-tool work or assembly. Finish work creates dust and odor; hand-tool work needs silence and space.
- Fixed drop-in points: Built-in slots for a miter saw, pocket-hole jig, or router table eliminate setup time and competing claims on table space.
- Vertical storage: Pegboard, shadow boards, and wall-mounted tool racks keep frequently grabbed items out of the way but instantly visible and retrievable.
- Height flexibility: If your roommate is 5'6" and you're 6'2", a 36-inch bench works for neither. Consider casters on one base frame so it can be positioned at different heights or a split-height design.
Step 1: Define Workflows Before You Build
Before cutting a single board, map out who does what and when.
Create a simple checklist:
- List each user's primary tasks - hand joinery, power-tool assembly, finishing, metalwork, or electronics. Write them down.
- Note peak hours - Are there times when two people might work simultaneously? When is the shop typically quiet?
- Identify conflict points - Does finishing work kick up dust that disturbs hand-tool focus? Does power-tool noise disrupt neighbors or other roommates?
- Sketch required tools per task - Hand tools, clamps, vises, sanders, or specialty rigs. Where does each need to live?
- Estimate surface area per workflow - A glue-up needs elbow room. A detail task needs a small, organized corner.
If you're looking at modular designs, this checklist is your specification. It prevents guessing.
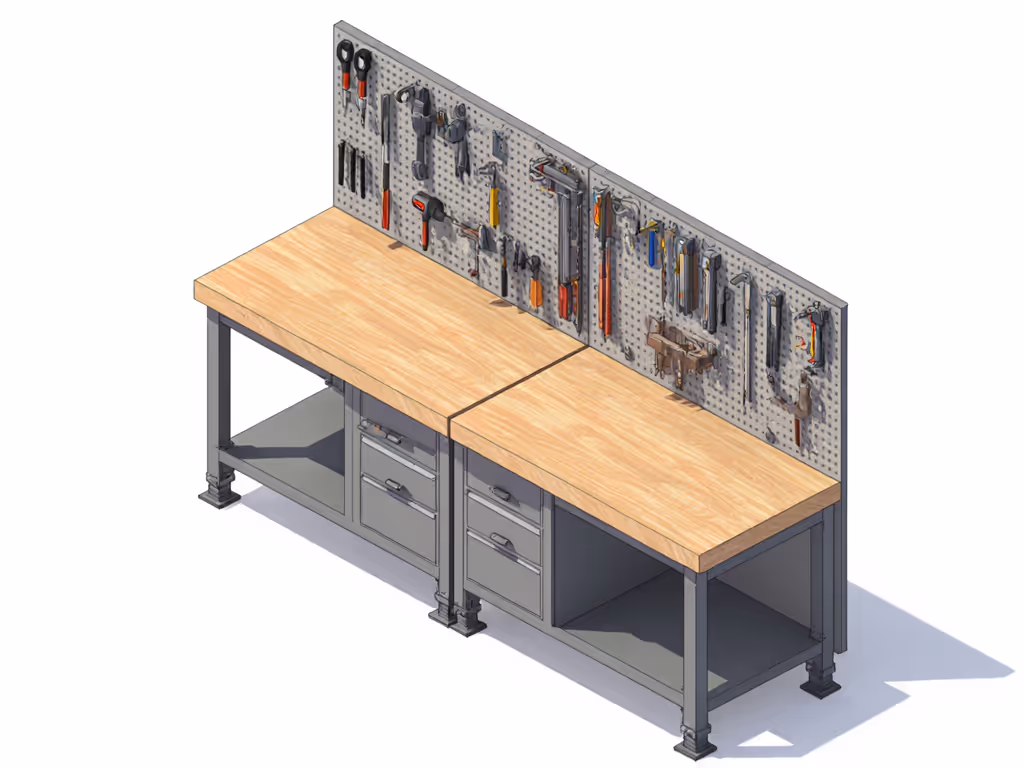
Step 2: Choose a Modular Base Structure
A shared space workbench thrives on configurations that adapt without rebuilding.
Two-half design: Build the bench as two independent sections that can be pushed together or separated. Each half gets four casters (locking for stability during work, released for repositioning). If you’re deciding which wheels to use, see our workbench caster guide for stability without sacrificing mobility. When one person needs the full 4×6 footprint and another needs a quiet 3×4 corner, reconfigure in minutes.
Drop-in tool integration: Plan for at least one fixed tool slot (miter saw, pocket-hole jig, or router table) recessed 3.5 inches into the bench top so the tool surface sits flush with the working plane. This eliminates the "where does the miter saw live?" argument and keeps the bench footprint lean.
Built-in storage tiers:
- Upper shelves (36 to 48 inches above the bench top): Rarely used specialty items, reference manuals, spare hardware.
- Mid-level pegboard or tool rail (18 to 30 inches): Hand tools and clamps used daily.
- Lower drawers or open shelving: Bulk supplies, finishing materials, project scraps by material type.
This vertical organization keeps the bench top clear (the most valuable real estate in a shared shop).
Step 3: Build the Frame for Rigidity and Noise Control
Shared spaces demand a bench that feels absolutely solid under load, especially if neighbors or other household members are nearby. Wobble or racking under clamping pressure will frustrate every user.
Frame material: 2×4 softwood (pine or spruce) joined with pocket screws works well for beginner builds. Pocket screws are fast, repeatable, and strong enough for moderate-duty benches. If you're confident with mortise-and-tenon joinery, that's even better; the traditional approach adds mass and damping.
Damping for noise: A shared bench should feel alive without telegraphing vibration into surrounding walls or floors. Add a dense top and consider mass-loaded material or acoustic backing where the bench meets the wall or floor. This isn't soundproofing; it's vibration isolation (a critical step in apartment workshop harmony). For techniques and materials that keep neighbors happy, dig into our vibration-damping workbench guide.
Base height: Standard is 34 to 36 inches. If your group has a mix of heights, consider a 36-inch bench (slightly lower, easier on the back for detail work) or plan for adjustable-height casters that dial in 1 to 2 inches.
Step 4: Design the Top for Shared Use
The work surface takes the hardest abuse in a multi-user workshop setup.
Material choice:
- Hardboard or plywood overlay: Replaceable, inexpensive, and serviceable. When glue, stains, or dents accumulate, unscrew and flip or replace the top in 30 minutes.
- Solid hardwood (maple or oak): More durable, flatness holds longer, but costly and harder to replace.
- Hybrid approach: Solid-wood core with a replaceable hardboard top. Best of both worlds for shared spaces.
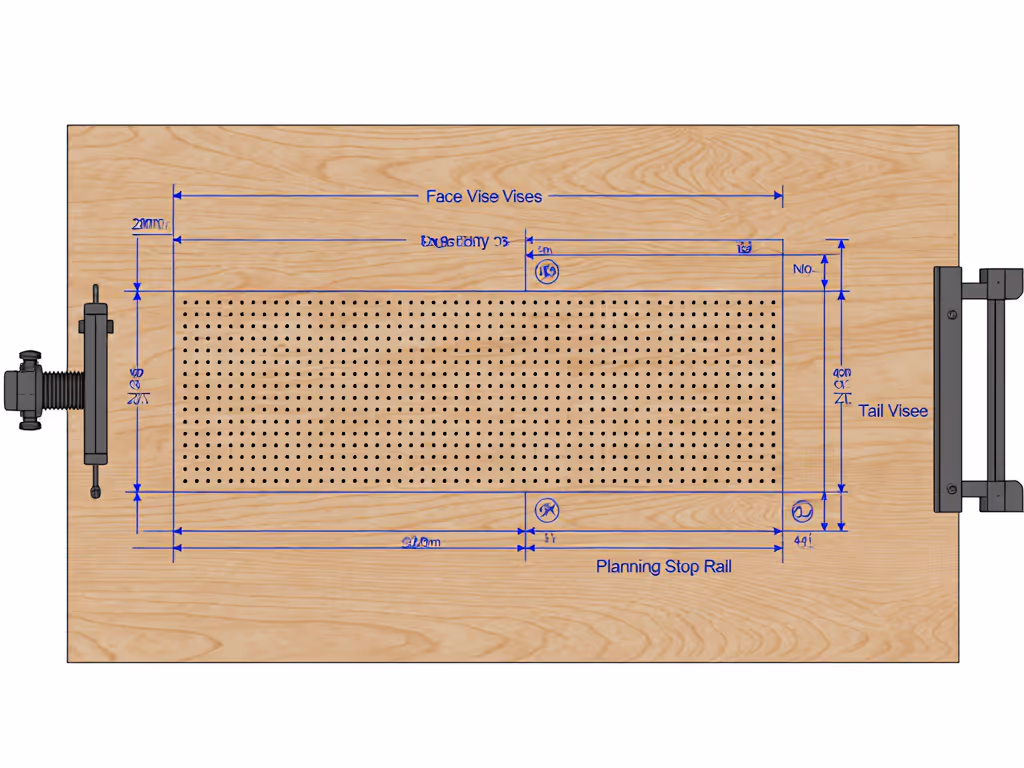
Surface features:
- Dog-hole grid (20mm spacing): Universally compatible with modern holdfast and clamping hardware. Mark clearly to prevent confusion.
- Bench vise mounting (face and tail vises): If budget allows, one face vise on each half. For tight budgets, a single tail vise on a removable cart that slots into a bench-end slot rotates between zones.
- Planing stop or clamping rail along the back edge to stop work during hand-plane strokes.
- Finish: Tung oil, paste wax, or polyurethane matte. Avoid high-gloss finishes (they're slippery and obscure flatness issues). Matte lets you see tool paths and marks that signal top drift.
Step 5: Establish Storage Zones and Labeling
This is where workflow discipline transforms a bench from chaos to coherence.
Assign ownership:
- Each user gets one drawer or shelf section. Tools live there. No exceptions.
- Consumables (sandpaper, glue, hardware) are communal but labeled and housed in clearly marked bins.
- Project work-in-progress gets a time limit (72 hours) before it moves to a designated finishing rack or shelf, freeing the bench.
Tool visibility:
- Shadow boards or foam tool inserts show instantly what's missing and where items belong.
- Label everything, even if it feels obvious to you. Shared spaces need zero ambiguity.
- Color-code by user (teal for you, red for roommate, yellow for shared) on clamps, holdfast handles, or tool rolls.
Daily checklist (printed and posted on the pegboard):
- Bench top cleared and wiped at end of session.
- Tools returned to shadow boards.
- Vises open and unloaded.
- Clamps back in the rack.
- Project scraps swept into recycling bin or wood-scrap bin.
- Shared consumables (glue, sandpaper) returned to labeled containers.
Three minutes of cleanup per session prevents the spiral.
Step 6: Establish Quiet Workshop Setup and Etiquette
Noise and disruption are the hidden killers of shared spaces. Proactive design sidesteps resentment.
Noise management:
- Reserve power-tool work (miter saw, planer, sander) to agreed-upon hours. Early morning and late evening are typically off-limits in shared homes.
- Designate a specific zone (ideally near a door or window) for loud work so sound doesn't propagate inward.
- Hand-tool work (chiseling, sawing, planing) is quiet and low-vibration; encourage it during off-peak hours.
Scheduling protocol:
- A shared calendar (paper or digital) with time slots. If quiet focus matters to you, book it.
- Aim for non-overlapping sessions. If overlap is unavoidable, agree on what each person will do (one finishes, one assembles, no power tools).
- Respect setup and breakdown time. A glue-up might need 90 minutes; schedule for 2 hours.
Communication:
- Weekly 10-minute sync. "Hey, I need 3 hours Saturday morning for planing. Are you planning to use the shop?" prevents last-minute frustrations.
- Text before arriving if the bench is claimed. A simple "heading over in 15" prevents collisions.
Putting It Together: A Confidence-First Checklist
Before you break ground, print this and tick each box:
- All users have defined primary workflows (hand tools, power tools, finishing, etc.).
- Bench footprint accommodates simultaneous use or non-overlapping workflows.
- Modularity plan in place (two halves, drop-in tools, movable cart).
- Storage zones assigned and labeled by user or task.
- Vise and clamping strategy matches most frequent tasks.
- Height confirmed as comfortable for all users.
- Noise and scheduling rules agreed upon in writing.
- Cleaning checklist posted and time-locked into routine.
- Weekly check-in scheduled to flag friction early.
The bench itself is just wood and hardware. The system (the workflow discipline) is what makes a shared shop hum. I've seen a humble 3×6 bench in a cramped basement with locking wheels, labeled zones, and a shared calendar outperform a gleaming 4×8 showpiece in a garage where nobody cleared the top in six months.
Next Steps: Dive Deeper
Ready to build? Start by surveying your space and sketching your two-half layout to scale. Measure doorways (can the finished bench move through them?), check ceiling height above the bench (clearance for tall clamps or a magnetic feather board), and confirm electrical access for drop-in tool slots. For wiring layouts, surge protection, and safe power strip mounts, use our workbench electrical integration guide.
If you're exploring modular designs, look for community builds or workshop tours online, and learn how others have solved the same clash of hand-tool silence and power-tool efficiency. Join a local woodworking guild or makerspace community; they often trial shared benches and can show you what works in your climate and space type.
The shared space workbench isn't a compromise. It's the first proof that workflow discipline (not cost or tools) transforms a workshop. Start there, and watch how the room itself tells you what's next.
Related Articles