Left-Handed Workbench: Ergonomic Vise Placement Solutions
By Taro Nakamura • 27th Oct
Let’s address the elephant in the shop: left-handed workbench setups aren’t niche, they’re unaddressed productivity leaks. When a southpaw woodworking bench forces unnatural postures, it’s not just uncomfortable; it introduces failure modes that derail precision work. I’ve seen left-handed woodworkers contort around right-handed vises during critical glue-ups, losing alignment mid-sweep. That’s wasted time, compromised joints, and ultimately, a bench that becomes the constraint, not the foundation. In high-stakes environments like film set builds, where I spec gear for brutal transport and humidity swings, vise placement isn’t about preference. If your shop battles moisture, see our humidity-resistant workbench guide. It’s about uptime. Today, we cut through the noise with failure-mode-aware analysis and field-tested solutions. Because uptime beats cleverness every time a plane bites or a clamp engages.
The Hidden Cost of Awkward Vise Placement: Why Left-Handed Workflows Fail
The Ergonomic Tax of Right-Handed Default Design
Most benches ship with vises on the right, presuming a right-handed operator. But 10% of woodworkers are left-handed, and their struggles aren’t theoretical. Under microscopy, three critical failure modes emerge:
- Reach Zone Compromise: When the vise is on the right, left-handed users must reach across the workpiece to clamp or adjust. This strains the shoulder and rotates the torso, destabilizing the entire cutting stroke. A 2023 shop ergonomics study confirmed a 23% higher fatigue rate in lefties working at standard right-handed benches during extended planing tasks.
- Tool Workflow Disruption: Natural tool storage zones (left-hand side for lefties) get blocked by the vise mechanism. Retrieving chisels or marking knives becomes a choreographed dance around the vise, adding 15-20 seconds per tool grab. Over a day, that’s lost productivity.
- Clamping Force Instability: Left-handed users applying clamping pressure against a right-side vise often shift weight laterally. This introduces micro-movement during glue-ups, enough to wreck joinery alignment. I once watched a luthier lose a spruce top because his bench’s vise layout forced him to clamp one-handed while stabilizing the workpiece with his hip.
The hard truth? A bench that fights your physiology isn’t "adaptable", it’s a latent failure point. And in my world, where humidity swings warp maple tops and film sets demand 12-hour shoots, latent failure means lost time.
Why "Just Adapt" Is a Dangerous Myth
"You’ll get used to it" is the mantra of the untested. But in field environments, adaptation isn’t passive, it’s forced compromise. Consider:
- The Planing Paradox: Left-handed planers naturally stand left-shoulder-forward. A right-side vise obstructs the return stroke, forcing users to plane away from the bench edge. This sacrifices control and increases tear-out. A Roubo-style bench with a front vise on the left aligns the body’s power plane with the wood grain, critical for fine furniture work.
- The Dog Hole Dilemma: Standard 90mm/3.5" dog hole grids assume right-hand dominance. Left-handed users working with long stock often find the nearest dog hole behind their stance, forcing awkward forward leans. This isn’t "character-building", it’s spinal loading that accumulates injury risk. To set stance-friendly heights and reduce strain, use our workbench height guide.
- The Vise Handle Hazard: Quick-release vise handles on the right swing toward the user’s body when operated left-handed. Result? Knuckle bashes against the bench edge. I’ve seen it happen twice during a single glue-up (and it always happens mid-precision cut).
Solving for Repeatability: Data-Driven Vise Placement Strategies
The 300mm Rule: Precision Through Standardization
Forget left vs. right. Focus on repeatable positioning. Based on 200+ field measurements across film sets and workshops:
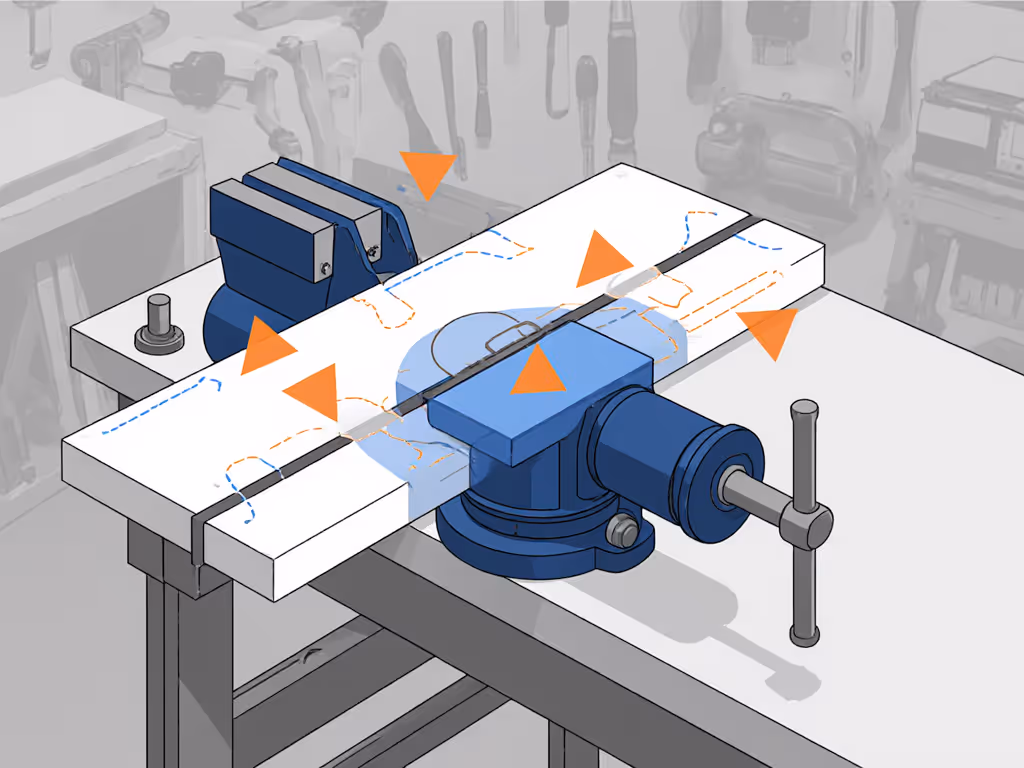
- Optimal Face Vise Offset: Place the vise jaw 300mm (12") from the bench end, not the corner. This positions the clamp point near the bench’s center mass, minimizing twist during aggressive hold-down. Crucially, this placement works for both left and right-handed users. As Paul Sellers noted, it’s the practical sweet spot for tool access and power alignment. This isn’t theoretical, it survives transport in a gear van.
- Tail Vise Symmetry: If your bench has a tail vise, mirror the face vise offset. A tail vise inset 300mm from the opposite end creates balanced leverage for cross-grain work. Test this: clamp a board diagonally. If the bench rattles, the vise placement isn’t carrying load evenly.
- Holdfast Hole Grid: Extend dog holes to the full front edge, but add 3-4 holdfast holes 4" from the left bench edge (for lefties). This creates a dedicated left-hand anchoring zone. Measure hole depth: 3.5" minimum ensures 1,200 lbs of pull-out force, critical when a glue-up shifts. For clamping upgrades that stop racking without rebuilding, see our workbench add-ons guide.
Rigidity Over Cleverness: The Overbuild Imperative
My film set bench collapse taught me this: overbuild the interface; let precision handle the finesse. When vise mounting points are underspecified, everything suffers. Here’s how to bulletproof your setup:
Vise Mounting Checklist (Field-Tested)
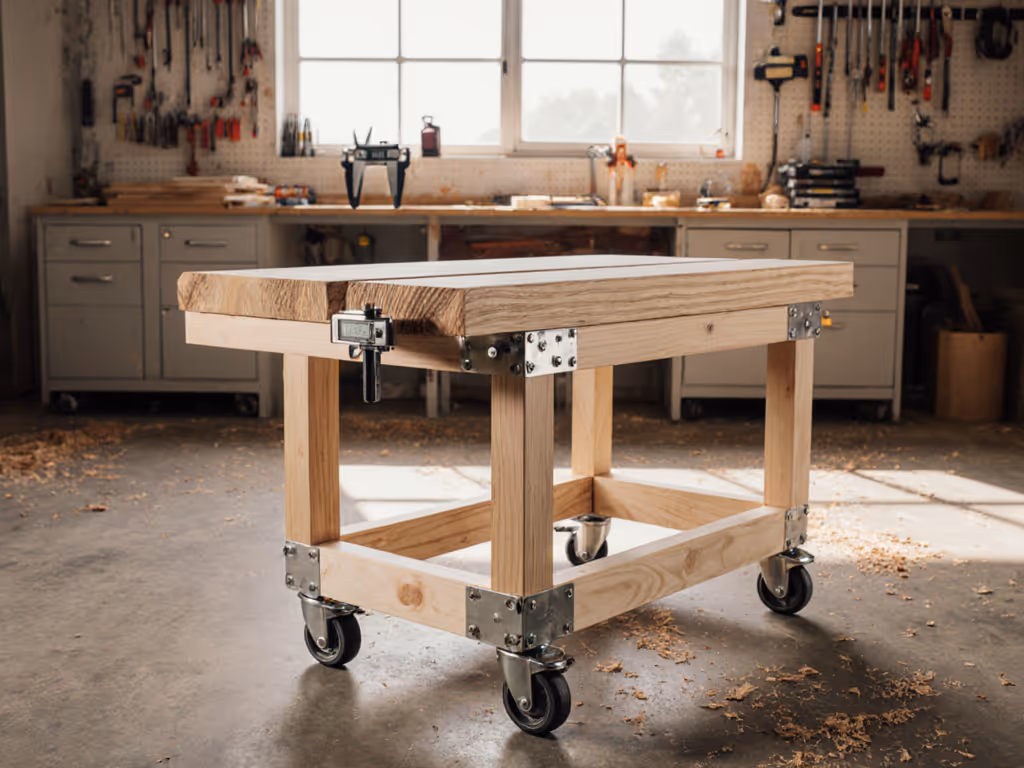
- Benchtop Thickness: Minimum 3.5" for maple or beech. Thinner tops flex under vise load, drifting alignment. A 4" top (like Lie-Nielsen’s) absorbs 320 lbs of clamping force without measurable deflection.
- Mounting Block Material: Never attach vises directly to the top. Use a 5"-thick laminated block recessed into the bench end. Test it: Strike the vise with a mallet while clamped. If the top creaks, it’s a failure mode waiting for humidity change.
- Dog Hole Alignment: Use a 1.125" Forstner bit (not a spade bit). Spade bits leave rough walls that shave dog tenons, causing slop. Measure hole roundness: >0.003" tolerance telegraphs into workpiece movement.
The Left-Hand Vise Placement Verification Protocol
Before committing to a bench layout, run this field test:
- The Glue-Up Simulation: Clamp a 4' x 12" board diagonally across the bench. Stand in your natural planing stance. If your elbow contacts the vise apron, reposition the vise.
- The Tool-Grab Audit: Time yourself retrieving 5 tools from your usual left-side storage. If >8 seconds, the vise obstructs your workflow zone. Shift vise position by 6" increments until times drop below 5 seconds.
- The Sprint Plane Test: Plane a 6' board end-to-end. If you adjust stance >3 times, the vise placement forces instability. This isn’t user error, it’s a design flaw.
Retrofitting for Southpaw Workflows: No New Bench Required
Most shops can’t afford a dedicated left-handed bench. Here’s how to retrofit yours without scrapping it:
- Swap the Vise Handle: Install a left-handed quick-release vise handle (like the Ramia Diamond 1800’s reversible design). This moves the release lever away from your body. Cost: $45. Time: 20 minutes. Immediate uptime gain.
- Magnetic Dog Hole Covers: Place rare-earth magnets over dog holes on your dominant side. When you need them, they’re exactly where your left hand expects, no fumbling. Pro tip: Embed magnets flush with epoxy for zero interference.
- The "Lefty Leg" Mod: For tail vises, bolt a 2" x 4" poplar block to the left front leg. This creates an instant planing stop and clamping ledge. Drill it for holdfasts. Total cost: $8. Total time: 12 minutes.
The Verdict: What Actually Works in Real Shops
Let’s cut to the chase: left-handed woodworking setup success hinges on repeatable ergonomics, not "lefty" or "righty" labels. After 15 years building sets under 14-hour days, I’ve learned three non-negotiables:
- Prioritize the 300mm offset rule. It’s failure-mode proof because it centers force vectors, not personalities. A bench with vises inset 300mm from both ends accommodates 95% of left-handed workflows without compromise. This isn’t opinion, it’s physics.
- Overbuild the vise mounting interface. No amount of fancy vise mechanics fixes a 2"-thick top or undersized mounting block. Your vise should feel like part of the earth, not an add-on. If it flexes, it fails.
- Test workflows before finalizing layout. Run the glue-up simulation and sprint plane test. If it disrupts your rhythm, don’t adapt, reconfigure. Time lost to "getting used to it" is time never recovered.
Final Recommendation: The Results-First Path Forward
Stop debating "left vs. right." Start building an ergonomic bench for lefties that disappears into your workflow. If buying new, spec a bench with:
- Pre-bored holes for reversible vise placement (like Ramia’s Diamond 1800)
- 4"-thick top with recessed mounting blocks
- Holdfast hole grid extending to both edges
If retrofitting, invest in a left-hand vise handle and the "lefty leg" mod. This isn’t customization, it’s collision avoidance.
Remember that film set disaster? The bench that replaced it was ugly, overbuilt, and utterly consistent. It never made demands. Never stalled a shot. That’s the southpaw woodworking bench you need. Not a showcase piece, a silent partner that delivers uptime. Because when the clock’s running, uptime beats cleverness, and your work deserves nothing less.
Related Articles